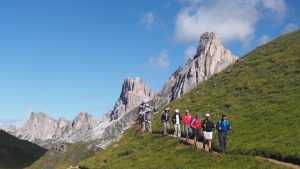
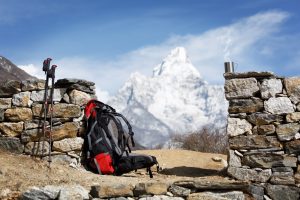
We consider trekking poles essential equipment on all of our hiking tours. Their advantages are simply too great to ingnore, from reduced stress on the knees, to enhanced stability on uneven terrain.
Just about every store with an outdoor section carries trekking poles, from $14 models at the neighborhood big box, to $200 investments at the local sports boutique. So how do we choose? Here’s a primer.
The Trekking Pole Advantage

Why do we use these things in first the place?
Reduced stress on knees and joints.
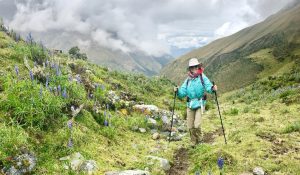
We find that long, steep descents often give hikers more trouble than climbing, and the number one reason is sore knees. Trekking poles offer a huge advantage. A 1999 study in The Journal of Sports Medicine, stated that trekking poles reduce compressive force on the knees by up to 25%.
Increased stamina while climbing.
A German physician discovered that each pole plant relieves approximately 18 pounds of pressure from the lower extremities when traveling on an incline. Consider that an average hiker makes around 45 pole plants each minute. The total weight savings over the course of a hike becomes enormous.
Reduced Muscle Soreness.
A new 2010 study by Northumbria University showed that trekking poles help hikers maintain muscle function while significantly reducing muscle soreness in the days following a hike. Does this mean that we have to skip the post hike hot tub? Not at all.
Enhanced balance and stability.
A pair of trekking poles transforms a hiker from a monopod to a tripod or, more technically, from a biped to a quadruped. The added base provides stability on uneven and/or slippery terrain. Think mountain goat.
Rhythm.
It’s a funny thing, but trekking poles really do help hikers find a natural rhythm. They might even help your singing career.
What To Look For
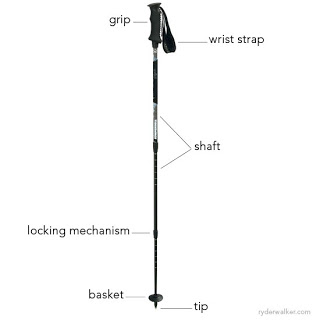
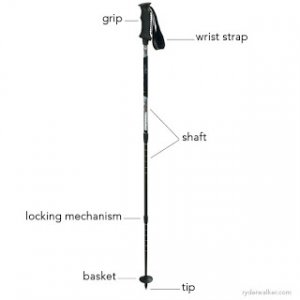
A trekking pole is basically a telescoping shaft with a grip on one end and a point on the other. The whole thing extends for hiking and collapses for storage and/or travel. That’s it. They’re usually sold in pairs, though it is possible to purchase individual poles, often referred to as walking staffs. For serious hiking trips like ours, hikers should always buy two poles.
In our experience, you’ll face two big choices when shopping for trekking poles.
- How light would you like your poles to be?
- Would you like your poles with shock absorption?
To answer the first question, consider this. In general, the more you pay, the lighter the pole will be, and a lighter pole equals easier maneuverability and less fatigue. Think weight isn’t important? Remember what we said earlier; at 45 pole plants per minute, the average hiker lifts their poles more than 20,000 times during the course of an 8 hour day. It adds up. Plus, lighter poles just feel better.
Regarding shock absorption, some poles feature internal springs for absorbing shock on downhills. Manufacturers call this antishock. These internal shocks usually increase the weight, and the price, of the trekking pole, but they reduce stress on elbows, shoulders, hips, knees and ankles while hiking. Our advice, if you suffer from injured joints, and you don’t mind paying a little more, go with the antishock. If you want the lightest pole available, you don’t care about bells and whistles, or you’re trying to save cost, go without.
Other Features
Shaft Material
Aluminum. Most low-to mid priced trekking poles feature aluminum shafts. Some manufacturers will advertise, “aircraft grade aluminum”, though this can be misleading since aircrafts use all sorts of grades for different uses. Most sports equipment uses 7075 aluminum. It’s strong, economical, and fine for most circumstances.
Carbon Fiber. Pay up and you’ll get carbon fiber. Carbon fiber is the most expensive option available, but it’s extremely light and strong. Your friends will envy you at the trailhead. Carbon fiber also reduces vibration. Again, 20,000 pole-plants in a day add up. The downside? Carbon fiber can splinter if you happen to fall on your pole. Aluminum will usually bend, in which case you might be able to bend it back. Trust us. We’ve seen both.
Locking Mechanism
Trekking poles are telescoping, meaning they have two or three sections that slide into each other to expand or collapse the pole. Each section is separated by a locking mechanism, also called an expander, and these locking mechanisms allow you to fix the pole at a desired length based on your height or terrain. Each manufacturer has its own style of locking device. Our advice: visit a couple stores that sell trekking poles and play around with the locking mechanisms. Keep playing until you find one that you like. The flick type locks tend to be the least confusing for most people, while the twist types tend to be the most common. (See our quick tips for adjusting the screw type expanders).
Size
Trekking poles are designed for adjustability. The general rule is to shorten your poles on steep climbs and lengthen your poles for descents. When sizing your poles on flat ground, make sure that you have enough left over to extend on the downhills. Taller hikers should purchase longer poles, while shorter people can get away with smaller versions. Compact versions are great for travelers because they’re easy to pack away.
Women’s Specific
Women are different than men. Can you believe it? Women’s specific poles are usually shorter and have smaller grips for smaller hands. Some manufacturers also make children specific poles.
Grips
Your choices are plastic, foam, rubber and cork. For summer hiking, we choose cork every time. It’s drier than plastic and rubber so it prevents chafing and it doesn’t get slippery. Cork grips also tend to be more ergonomic. For cold weather and gloved hiking, rubber is an old standby. Find a grip that fits comfortably. Your hands will thank you.
Straps
Virtually every pole includes wrist straps. More expensive models include comfortable padding, softer materials, ergonomic design and easier adjustability. You get what you pay for.
Baskets
Most poles come with small baskets for summer hiking. Consider a pole with larger, interchangeable baskets if you plan to use your poles in the winter or in boggy, muddy conditions.
Pole Tips
Look for carbide tips. They won’t wear down like aluminum or soft steel.
A Note About Fit
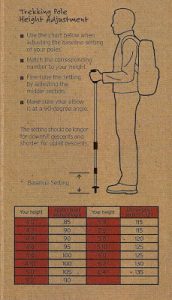
Leki has a great little graphic that we included in a previous
post. The idea is to shoot for a 90-degree angle at the elbow when gripping the pole, and then make minor adjustments based on personal preference. Note: all trekking poles feature measurement markings, usually noted in centimeters, along the shaft. Use these markings to help size your poles.
Summing It Up
Follow these three steps for an easy purchase.
- Decide how much you’d like to spend, and think hard about the amount of technology that you really need. If you don’t plan on using your poles on a regular basis, then you can probably get away with spending less. Are you a regular hiker? You’ll appreciate nicer poles. They really do make a difference.
- Try before you buy. Visit a few outdoor shops and play with as many styles as you can. Pick the pole that feels good and fits your style. Test the locking mechanisms. Adjust the straps. Extend and collapse the poles. You’re more likely to use your poles if they’re fun and easy to use. (Note: this step might actually encourage you to spend a bit more). In fact, try the ultra cheap models and see if you notice a difference. We do.
- Check out a few of our favorite brands. (Note: We do not receive compensation from these companies). Our guides have field tested these brands and they like them. That’s all.
Quick Tips and General Trail Etiquette
These are some of the most common tidbits that we’ve encountered along the trail.
- Remove the protective caps before hiking. Some trekking poles feature removable rubber tips for low impact hiking or use on pavement. These rubber tips are different from the thin plastic caps that accompany new poles. Remove the thin plastic caps before hiking, or the trail will remove them for you.
- For quick trail fixes, wrap a long piece of duct tape around the shaft. Wrap the tape over itself a few times and you’ll have spare duct tape whenever you need it.
- Self-adjusting poles do not adjust by themselves. You, with your own hands, adjust your poles. Futuristic trekking poles will probably monitor terrain and adjust on their own. They might even brew espresso while you hike. We’re not there yet.
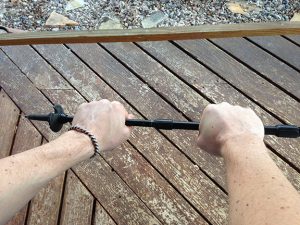
- To adjust trekking poles with screw type locking mechanisms remember this: to loosen the expander, hold the lower section of your pole rigid, with tip pointed down. Spin the upper section to the left. To tighten; hold the lower section rigid while spinning the upper section to the right. See our previous post about maintenance and jammed expanders.
- Be conscious of those around you. This means collapsing your poles and carrying them close to the body when not in use. Better yet, collapse and stow your poles in your pack with the tips down. Nobody likes a trekking pole in their eye.
- Reduce your environmental impact. One hundred hikers with trekking poles will leave 200 little marks along the trail. Two hundred hikers will leave 400 marks. Four hundred hikers…you get the picture. Try to keep your poles on the trail as much as possible, and avoid sensitive areas. Likewise, go easy on the rocky sections. Marks in the dirt eventually wash away. Scratches on rock take a lot longer to disappear.
You Might Also Like...
Ryder-Walker’s Tips on Trekking Poles, Boots and Hiking Techniques Do you ever find yourself questioning
Trekking Poles So, you are getting ready to embark on your Ryder-Walker hiking trip
On the right foot: Choosing the best shoes for your trek During a Ryder Walker
Gear up for your trek: tips for a perfect packing list When embarking on a
The basics of base layers On a Ryder-Walker hiking tour, you’ll spend the majority of
Dialing in your outer layers for hiking Perhaps you’ve done your homework on base layers,
New trekking poles usually come with protective trekking pole tip covers. The covers are great
Getting Trekking Poles Unstuck The old screw-type expandable trekking poles from Leki are notorious for
Traveling with Trekking Poles Hikers have it pretty easy. If we want to hike
We consider trekking poles essential equipment on all of our hiking tours. Their advantages are
Trekking poles make a nice holiday gift for the avid hiker. They reduce stress on
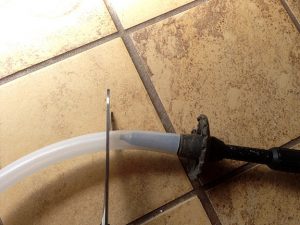
Servicing Trekking Poles We recently discovered that water (from a rainy season as an example)


Comments are closed.